ROOM 13 Players Hub
Badge requirements, clear tips, and solo versus co-op notes for every night shift award.
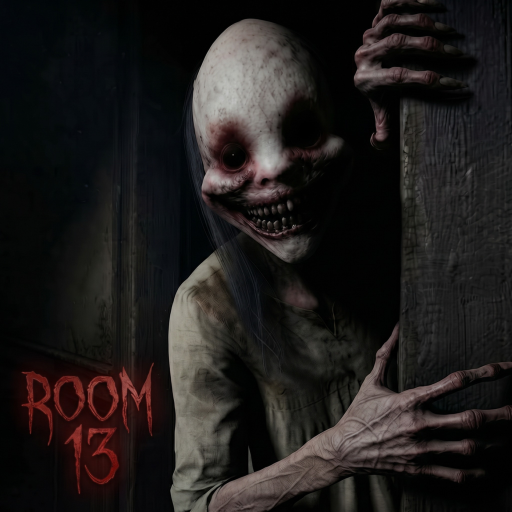
The Players Hub is the badge completion center for ROOM 13 [HORROR] by CCU Zone. Every award below tracks hospital night-shift progress: starting work, surviving each night to 6 AM, and finishing all six shifts. Approximate clear rates mirror official rarity, so you can see which badges are Freebie warm-ups and which demand real discipline. Pair this page with the Tier List Hub for difficulty context, the night walkthrough for route plans, Getting Started for controls, and the co-op guide when you queue with friends.
ROOM 13 runs solo or with up to four players. Your job is to answer call bells before they time out, hide in lockers while holding your breath, and avoid giving She free information through light and sound. Miss three bells and the shift ends. Badge progress is sequential in practice: you will earn Clocked In first, then Night 1 through Night 5, then Last Shift if you survive the full gauntlet.
Badge overview and clear rates
| Badge | Requirement (summary) | Approx. clear rate | Feel |
|---|---|---|---|
| Clocked In | Start your first shift | ~95% | Freebie |
| Night 1 | Reach 6 AM on Quiet | ~47% | Onboarding |
| Night 2 | Reach 6 AM on Restless | ~26% | Habit check |
| Night 3 | Reach 6 AM on Uneasy | ~15% | Speed spike |
| Night 4 | Reach 6 AM on Hunted | ~10% | Party filter |
| Night 5 | Reach 6 AM on Relentless | ~7% | Endurance |
| Last Shift | Survive all six nights | ~3% | Full clear |
Night codenames: Quiet, Restless, Uneasy, Hunted, Relentless, Last Shift. Use the tier list if you want these rates translated into S–D difficulty ranks and survival priorities.
Clocked In — start your first shift
Requirement: Begin work on the hospital night shift for the first time.
Tips: Load into the experience, start a run, and the Freebie award should unlock almost immediately. If it does not appear, confirm you are in the live ROOM 13 place and that Roblox badge awards are enabled on your account. No stealth skill is required.
Solo vs co-op: Identical. Host or join—either counts as clocking in.
Next step: Read Getting Started for PC and console controls (WASD or stick move, Shift or stick-click sprint, F or Y flashlight, E or X use, Space or A hold breath, Tab or LB map) before chasing Night 1.
Night 1 — Quiet
Requirement: Make it to 6 AM on the first night (Quiet).
Tips: Treat Quiet as a lab. Answer every bell with buffer time, practice short flashlight pulses, and learn where lockers sit on common routes. Open the map before long hallway commits. Do not sprint everywhere—She hears running, and bad stamina habits carry into later badges. If a bell is far and she is mid-hall, take the longer safe path.
Solo vs co-op: Solo is very doable. Co-op should still assign wings so nobody triple-stacks one bell while another rings out.
Linked practice: How to answer bells and early routes in the night walkthrough.
Night 2 — Restless
Requirement: Reach 6 AM on the second night (Restless).
Tips: Restless punishes the players who cleared Quiet by luck. Keep the flashlight off in open sight lines, stop panic sprinting between nearby bells, and hide earlier when audio cues spike. Hold breath the instant a locker closes. Community clears often mention that map spam during a chase causes more deaths than the chase itself—peek the map, close it, move.
Solo vs co-op: Solo players should slow down and accept detours. Co-op groups should start rotating a light generator duty so power problems do not force desperate crosses later.
Night 3 — Uneasy
Requirement: Reach 6 AM on the third night. Official flavor: halfway through, and she is getting faster.
Tips: Uneasy is where clear rates drop near fifteen percent. Pre-plan two exits from every bell room. If she occupies the short route, reverse immediately. Keep one miss in reserve—never spend your third miss on a greedy shortcut. Practice locker entries until breath control is automatic; review how to hide if you keep getting found after ducking in.
Solo vs co-op: Coordinated duos often beat random fours here. Voice callouts of her last hallway matter more than raw player count.
Night 4 — Hunted
Requirement: Reach 6 AM on the fourth night (Hunted).
Tips: About one in ten players earn this badge. Hunted filters parties that never learned roles. Split the map, answer nearest safe bells first, and refuse to chase a ringing bell through her silhouette. After answering, leave the area instead of celebrating in the open. Flashlight discipline becomes mandatory: pulse for landmarks, then dark.
Solo vs co-op: Solo clears need patience and perfect miss management. Co-op shines if one player owns generators while others cover bells—see the co-op guide. Uncoordinated lobbies usually burn three misses in one hallway pile-up.
Night 5 — Relentless
Requirement: Reach 6 AM on the fifth night. Flavor text signals one night left.
Tips: Roughly seven percent clear Relentless. Play for survival, not speedruns. Keep miss count at zero as long as possible. When bells cluster in one wing, send only the closest player in co-op; solo players clear what is safe and accept that some paths wait for her to pass. Hide in a nearby room if she cuts you off instead of forcing a sprint past her.
Solo vs co-op: A calm trio with roles beats a noisy full lobby. Solo is a mastery check—expect multiple attempts even if Night 4 felt stable.
Last Shift — survive all six nights
Requirement: Survive the full six-night sequence (Quiet through Last Shift).
Tips: Only about three percent of players finish the gauntlet. Last Shift combines everything ranked on the tier list: map discipline, breath control, flashlight discipline, bell routing, and generator duty. Before the final night, agree on callouts, confirm who watches power, and remind everyone that longer safe routes beat short deadly ones. Do not open the map in her face. Do not leave lockers without holding breath. Do not spend your last miss on ego.
Solo vs co-op: Both are valid. Solo Last Shift proves personal consistency; co-op Last Shift proves role discipline. If your group keeps dying on Night 6, stop adding randoms and run a fixed squad through the night walkthrough plan.
Suggested badge grind order
- Clocked In while learning controls from Getting Started.
- Night 1 Quiet with intentional map peeks.
- Night 2 Restless focusing on light and sound.
- Night 3 Uneasy until breath holds are automatic.
- Night 4 Hunted with assigned co-op roles or a patient solo pace.
- Night 5 Relentless with zero-miss ambition.
- Last Shift as a full-run clear, not an isolated Night 6 practice void of earlier habits.
Tracking tips for players and squads
- Check Roblox inventory badges after each successful 6 AM to confirm awards landed.
- If a night clear did not grant the badge, verify you finished that night rather than disconnecting during the dawn transition.
- Use clear-rate gaps as a coaching signal: stuck between Night 2 and Night 3 means fix flashlight and sprint habits; stuck on Night 4+ means fix roles and routing.
- Keep this hub bookmarked beside the Tier List Hub so rarity context stays next to unlock tips.
ROOM 13 badges are a clean ladder. Clocked In proves you showed up. Night badges prove you can work the hospital under rising pressure. Last Shift proves you can do it for the entire week of nights. Earn them in order, practice the linked guides between attempts, and treat every miss as feedback—not as a reason to sprint harder into her light.
Frequently Asked Questions
Quick answers for night-shift survivors.
How many badges does ROOM 13 have?
Seven tracked here: Clocked In, Night 1 through Night 5, and Last Shift for surviving all six nights. Clear rates range from about 95% Freebie down to roughly 3% for the full clear.
Do I need co-op to earn Last Shift?
No. Last Shift can be earned solo or with up to four players. Co-op helps when roles are clear; uncoordinated groups often make late nights harder.
What does miss three bells mean for badges?
If three bells ring out unanswered, the shift fails and you will not earn that night's 6 AM badge. Protect your miss budget especially from Uneasy onward.
Why did I clear a night but not get the badge?
Confirm you reached 6 AM on that night in the live experience, stayed until the clear registered, and check Roblox badge inventory. Disconnects before dawn can skip the award.
Where should I practice before grinding Night 4+
Use Getting Started for controls, the night walkthrough for routes, how to hide for locker breath timing, how to answer bells for routing, the co-op guide for roles, and the tier list for priority order.